GoAnywhere has over 35 Cloud Connectors available on the GoAnywhere Marketplace, ready for installation today. This lesson will walk through the process of installing the SharePoint Cloud Connector and how to use it within a workflow.
Installing the Cloud Connector
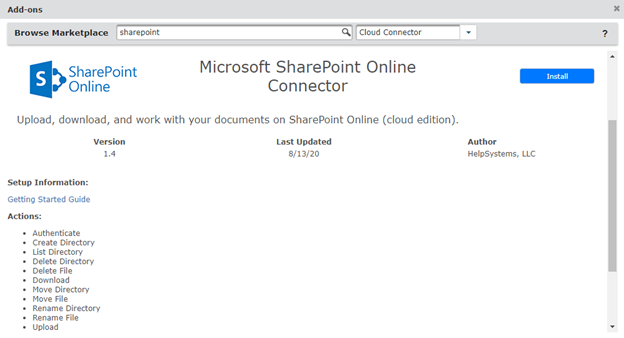
To get started, navigate to System > Add-ons. This will be where all the currently installed Cloud Connectors are shown. To install a new Cloud Connector, click on “Browse Marketplace,” then search or scroll down to find the connector. Once this add-on has been located, clicking on the logo will expand it with additional information. This will show the current version of the Cloud Connector, the different features it offers, and a link to its respective Getting Started guide. There will be a button on the right side to Install or Trial the connector.
Adding the Cloud Connector
Once the download is installed, the next step is to define that Resource. Navigate to Resources > Cloud Connectors to see any existing Resources. To create a new one, click “Add Cloud Connector.”
Here is one that is filled out already:
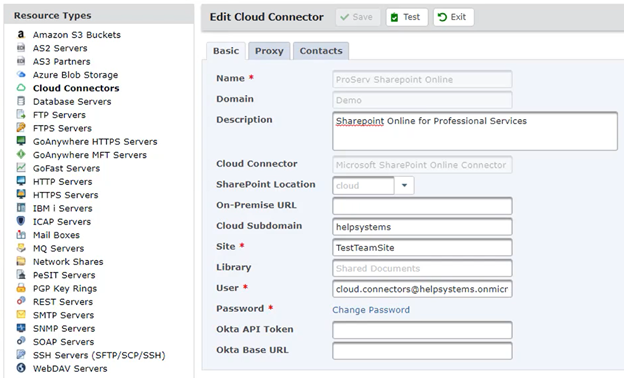
Define the information to connect to the site, then Test it out and make sure the connection is successful. After the Resource Test succeeds, it is ready to be used in a Project workflow.
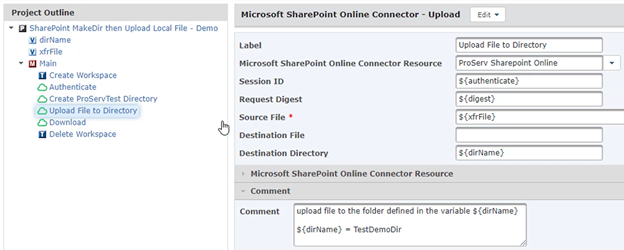
Using the Cloud Connector in a Project
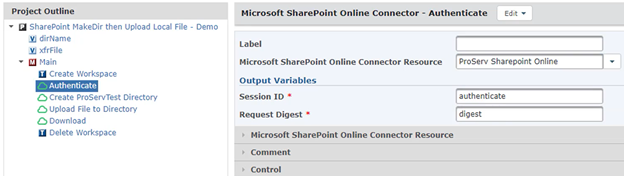
In this example Project, there are two defined Variables – one for the directory that will be created, and another for the file that will be uploaded. After that, the first Task creates a temporary workspace within the Project, and then the workflow moves on to the SharePoint Tasks.
The available SharePoint Tasks can be found in the Component Library under Cloud Connectors, then Microsoft SharePoint. The Authenticate Task comes first. This Task will connect to the SharePoint Resource created earlier. It will define variables for the Session ID (“authenticate”) and Digest (“digest”) which will be used in following Tasks.
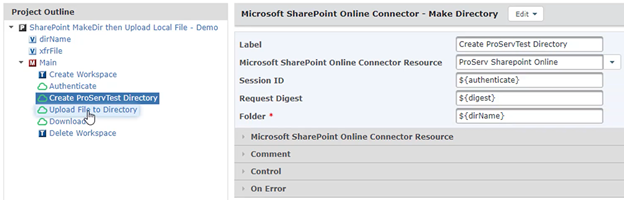
After authentication, the next step will create a directory in SharePoint. The fields will take in the Session ID and Digest variables created prior.
The following Tasks, which upload and download a file respectively, are defined similarly.
Finally, the temporary Workspace directory is deleted, which is considered best practice for Workspaces.
The Last Steps
Once everything is in place, run the Project and make sure it works. Click “View Job Log” to review and see the steps where the Project authenticates, creates a directory, and uploads and downloads a file.
That is all there is to it – Cloud Connectors make it simple to connect and run workflows to many external resources.