Cloud Connectors allow GoAnywhere to easily integrate with popular SOAP and RESTful web service applications like Salesforce, Box, Dropbox, Microsoft Dynamics CRM, and more. Once a Cloud Connector is installed, you configure the connection properties to the service as a Resource. This reusable resource allows you to specify the cloud connection properties once, and then they can be used over and over in your workflows.
In this tutorial, you will learn how to navigate the Cloud Connector Marketplace, how to download new Cloud Connectors, how to configure Cloud Connector Resources, and how to use Cloud Connector actions in a Project Workflow.
Downloading and Installing Cloud Connectors
The Cloud Connector Marketplace provides an online catalog of Cloud Connectors that can be downloaded to the GoAnywhere installation and used in Project Workflows. To access the Cloud Connector Marketplace, navigate to the System > Cloud Connectors page. Once there, click the Add Cloud Connector button.
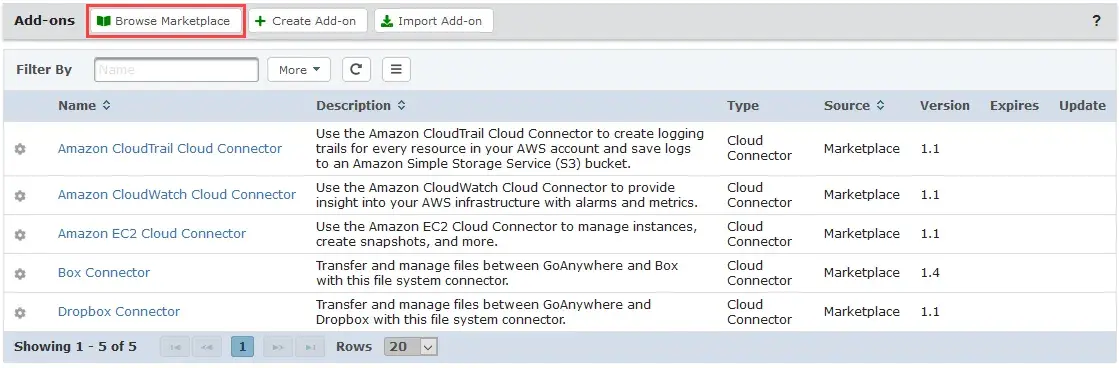
Within the Marketplace window, you will find a list of available Cloud Connectors along with a brief description, a version number, the date the connector was last updated, and a list of actions available to that Connector.

Identify the Cloud Connector you wish to install, or search for a connector using a keyword search.
If you are licensed to use the Cloud Connector, select "Install" to download and install it. If not, select "Trial" to download a trial version of the connector. The Marketplace window will close and you will receive confirmation that the connector was successfully installed.

Using a Cloud Connector as a Resource
Once a Cloud Connector is installed or created, you configure the connection properties to the API as a Resource. This reusable Resource allows you to specify authentication and service level information once, and then they can be used over and over in your Workflows.
To add a Cloud Connector Resource:
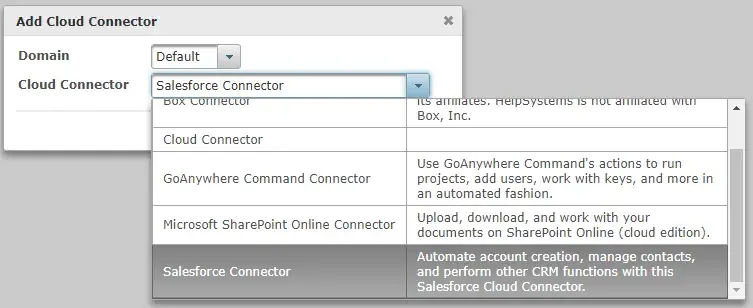
- Navigate to the Resources page and select ‘Cloud Connectors’ from the Resource Type list.
- Select ‘Add Cloud Connector’.
- Select a domain and a Cloud Connector from the list of those you have installed.
- Click ‘Continue’.
The fields for each Cloud Connector will be unique to the API the Cloud Connector is connecting to. Refer to the API's documentation to determine the connection properties for the API. The example below shows the connection properties for a Salesforce Cloud Connector Resource.
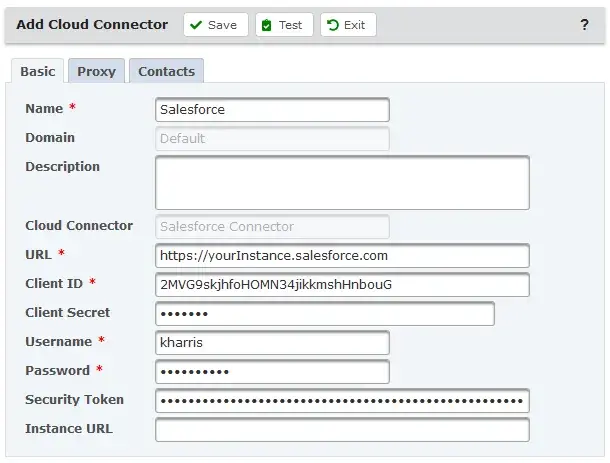
Once you’ve entered the connection properties for the API, you can click the ‘Test’ button to test the connection to that API. The test results will be displayed in a popup window indicating a success or failure.
Using Cloud Connectors in Project Workflows
Cloud Connectors you have installed will appear in the Cloud Connector section of the Component Library in the Project Designer. To navigate to the Project Designer:
- Log in as an Admin User with the Project Designer role.
- From the main menu, select Workflows, and then click the Projects link.
- Drill down to the folder you want to work in.
- Select a Project to edit it. Otherwise, to create a new Project, click the Create a Project link in the page toolbar.
- The Project Designer page will be shown. Expand the Cloud Connector panel in the Component Library.
Image
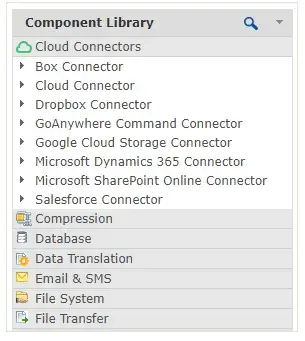
Project Designer Component Library - Expand a connector in a list to view a list of actions available to that connector.
Image
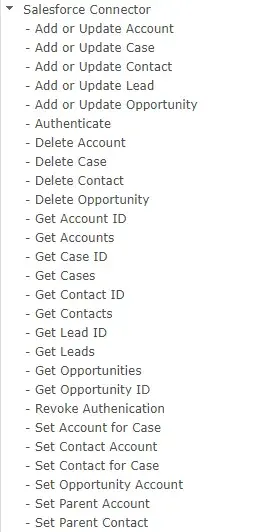
Cloud Connector Task Actions - To use a Cloud Connector action in a Project Workflow, simply drag the desired action to the Project Outline.
- Select the Cloud Connector Resource you configured above, and then any optional parameters to complete the action.
Image
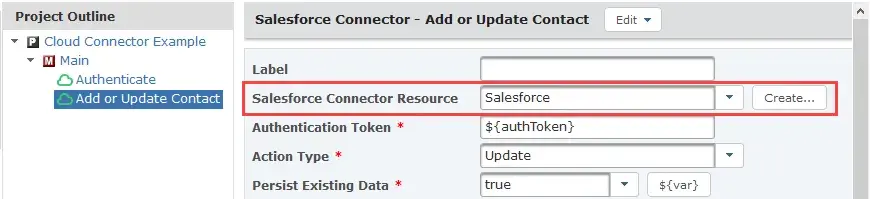
Cloud Connector Project
When executed, the Project will authenticate with the cloud service using the connection properties defined in the Cloud Connector Resource. Once authenticated, any defined actions will then execute.
Cloud Connector tasks can be combined with other tasks to create a complete workflow. For example, a Cloud Connector task could retrieve files from a cloud storage service. Those files could then be read, updated, encrypted, or processed further by other GoAnywhere tasks before being returned to the cloud.