In this tutorial, you will learn how to configure the AS2 client in GoAnywhere MFT. The AS2 client is used to send messages to an AS2 service. AS2 messages can be compressed, signed, encrypted and then sent over an SSL tunnel, making AS2 a very secure option for transferring files. AS2 also implements MDN receipts to ensure the delivery of the message. Learn more about AS2.
Initial Planning
Contact each of the trading partners with whom you will send AS2 messages.
Obtain the following key pieces of information from each partner:
- The URL of their AS2 server. If the URL begins with HTTPS and the SSL certificate for encrypting the HTTP tunnel is not signed by a trusted certificate authority, you will need to obtain and import their HTTPS server certificate.
- The AS2 ID for their server.
- If you plan to encrypt the messages you send your trading partners, obtain and import their public certificate.
In addition, provide each partner with the following:
- Your AS2 ID. Your ID is an arbitrary name that the receiving server will use to validate your identity.
- If you plan to sign your messages, provide the trading partner with your public certificate that matches the private key used to sign messages.
To assist you with sharing AS2 service information with your trading partner, download the AS2 Trading Partner Form. Fill out the form in its entirety, and then send the form to your trading partner.
Importing your Trading Partner's Public Certificate
If you plan to encrypt messages, you’ll need to import your partner’s public certificate. To do this, log in to GoAnywhere MFT as an Admin User with the Key Manager role.
From the main menu, select the Encryption menu, and click the SSL Certificate Manager link. You will arrive at the Trusted Certificates Store by default.
On the tool bar, click Import > Certificates.

Browse for the location where the trading partner’s public certificate was saved and then click Import.
Specify an Alias to identify the certificate. Note the Alias, as it will be used later.
If the import was successful, your partner’s public certificate will now reside in your Default Trusted Certificates Key Store.
If your trading partner provided you their HTTPS public certificate, follow the instructions above to import it into your trusted key store.
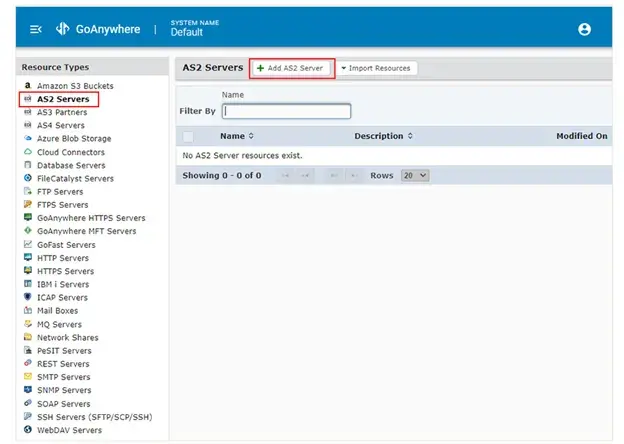
Defining the AS2 Server Resource
Resources are the names and connection properties of the servers, and other data sources, that GoAnywhere can interact with. Admin users with the Resource Manager role can create and edit Resources.
Log in as an Admin User with the Resource Manager role.
On the main menu, click Resources. On the Resources page, click the AS2 Servers link in the Resource Type panel, and then in the page toolbar, click Add AS2 Server.
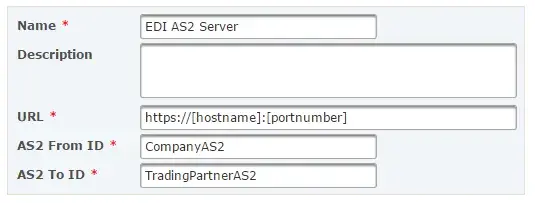
Specify the parameters and the credentials for the AS2 server obtained in the Initial Planning section.
- URL - This is the URL to the AS2 service provided to you by your trading partner.
- AS2 From ID - This is your arbitrary AS2 ID that you provided to your trading partner.
- AS2 To ID - This is your partner's AS2 ID they provided to you.
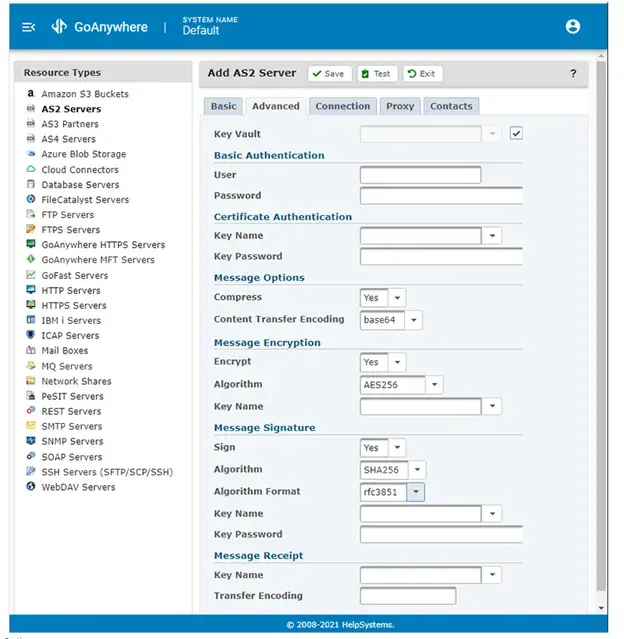
Specify the optional AS2 security settings below:
Encrypting Messages
When sending a message to a trading partner, it is highly recommended and sometimes required to encrypt the contents of a message. To add encryption, set the Encrypt Messages option to Yes in the AS2 Resource.
Next, specify the trading partner's public certificate in the Encryption Certificate Alias field. Type the alias name or click the browse icon to browse for the certificate.
Signing Messages
Digital signatures added to an AS2 message allow the recipients to verify who you are. To add a digital signature to a message, set the Sign Messages option to Yes.
In the AS2 Resource, specify your private key in the Signature Certificate Alias field. Type the alias name or click the browse icon to browse for the key. In order for your trading partner to verify your signature, you will need to export and send them the public certificate associated to this private key.
Compressing Messages
Compressing messages reduces the message size and can improve transmission time. To add compression, set the Compress Messages option to Yes in the AS2 Resource.
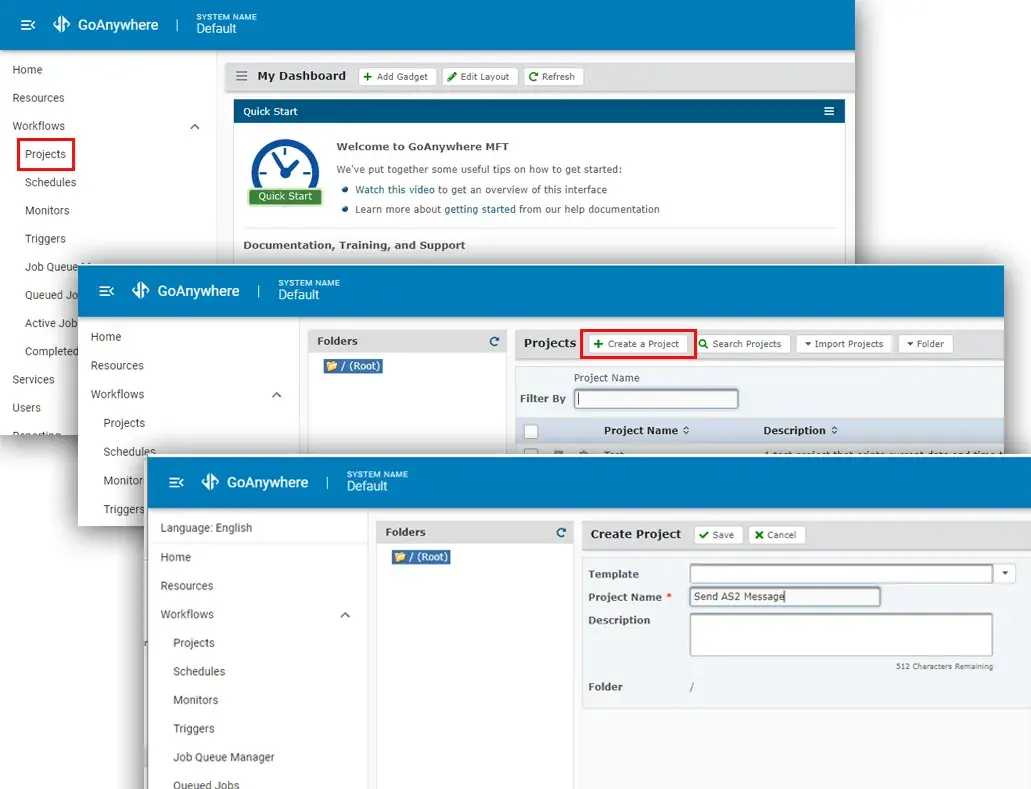
Defining the AS2 Task
In order to transfer files to the AS2 Server you defined above, you will need to create a Project in GoAnywhere.
Not using GoAnywhere MFT yet? Start a free trial and test it out for 30 days.
START FREE TRIAL
Login to GoAnywhere MFT as an Admin User with the Project Designer role. On the main menu bar, click Projects and select the folder for the new Project.
In the page toolbar, click Create a Project, specify a Project Name, and then click Save.
From within the Project Designer page, expand the File Transfer folder in the Component Library, and then drag the AS2 task to the Project Outline.
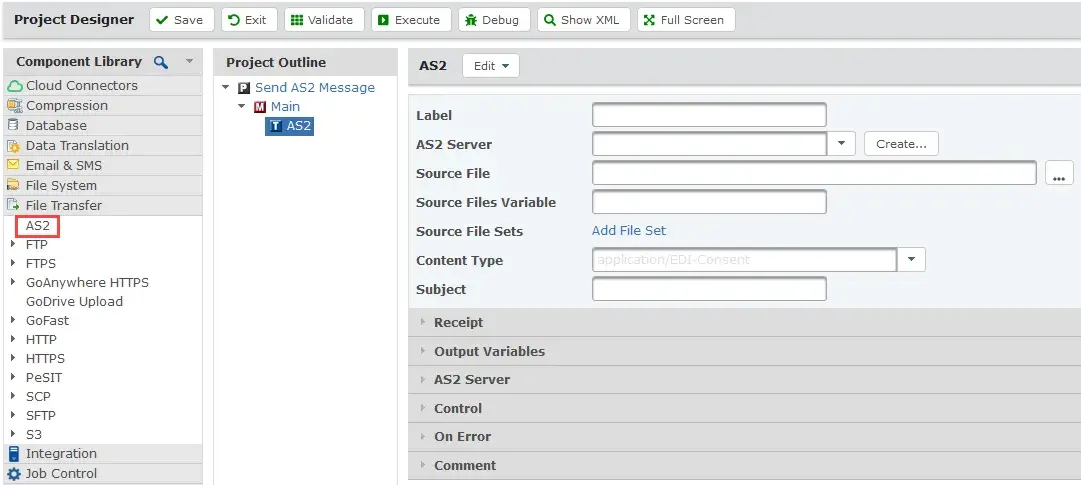
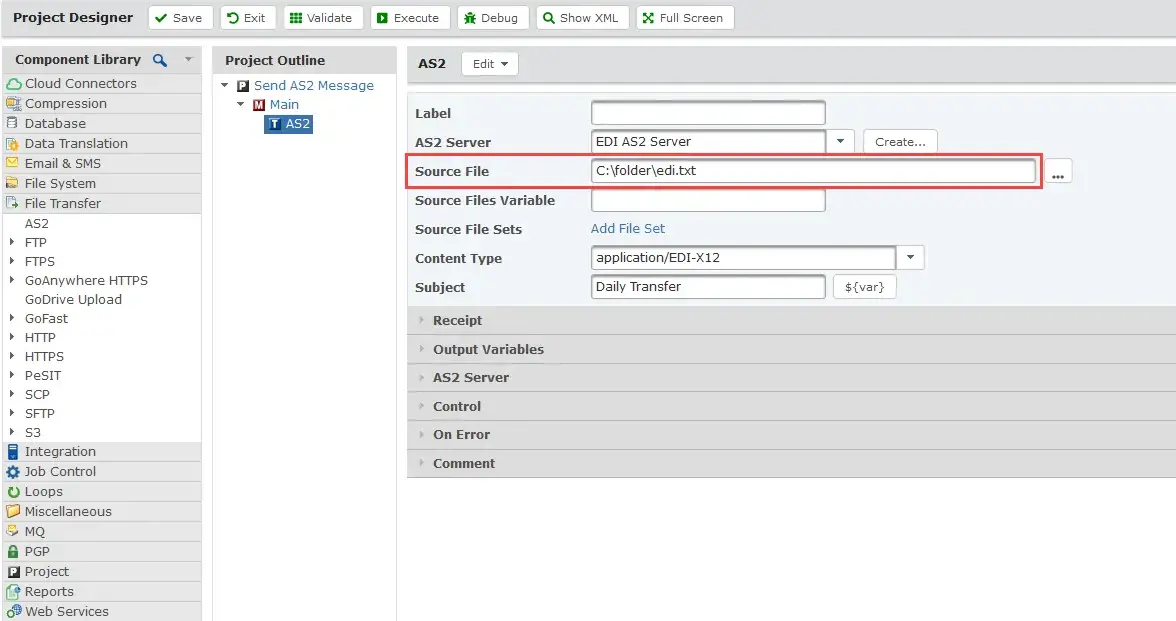
Within the AS2 Task page, select the AS2 server resource created above from the drop-down list.
Type the path and file name of the Source File or click the browse icon to browse for the file. A File Set can also be defined to send multiple files in one message.
Optionally specify the Subject, Content Type, and Receipt options for this message. When complete, click the Save button. The Project is ready to execute.
Processing MDN Receipts
The AS2 Task provides the option of receiving delivery confirmation in the form of a Receipt. If a Receipt is desired, use the Request Receipt panel to select signed or unsigned receipts. Receipts that are signed ensure authenticity. Signed messages and receipts are considered a Non-Repudiation of Receipt (NRR), which is a “legal event” indicating that both party’s identities and the message’s integrity are valid.
When using receipts, an AS2 Task Output variable can be defined and used elsewhere in the Project to control how other tasks function based on the receipt message or status. If a receipt is requested, the following Receipt Destinations (or types) are available:
Synchronous Receipt Types
In a synchronous scenario, the connection remains open between the AS2 server until a receipt is received or a timeout occurs. The following Receipt Destination options require synchronous receipts:
- Job log - The receipt will be saved to the Project's Job Log.
- File - The receipt will be written to a specified file.
- Discard - The receipt will be processed and verified, but not stored.
Asynchronous Receipt Type
In an asynchronous scenario, the connection closes immediately after the transmission is complete. When the AS2 server is finished processing the message, the server will open a new connection and send the receipt. The following Receipt Destination options require asynchronous receipts:
- Email - The receipt will be sent to the email address specified in the Receipt Email attribute.
- URL - The receipt will be sent to the URL specified in the Receipt URL attribute.
Automating Project Workflows
Now that you have created a project for transferring files to an AS2 Server, check out the Automating Project Workflows tutorial to learn how to automate your project.