Secure Forms allow end users to fill out customized forms with one or more input values and optionally upload files. Users can access Secure Forms through the HTTPS Web Client in GoAnywhere or submit forms by making SOAP or REST requests from custom-built applications.
When a form is submitted, a Project in GoAnywhere is executed to automatically process the submitted values and files. This information goes from the Secure Form to the Project, which can be used with other Tasks. This example will use a Secure Form for the onboarding process – adding a new Web User into GoAnywhere.
Adding a New Form
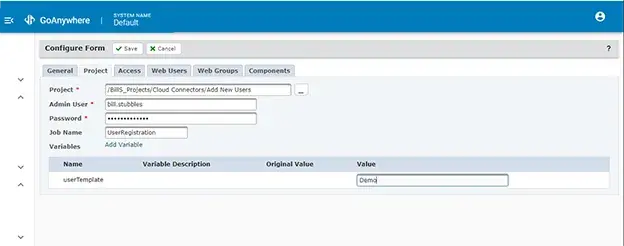
From the Form Manager, simply click on the button to add a new form. The General tab contains basic information about the form. The Project tab is what the Project will be called when the form is submitted, and which Variables should be passed to the Project. Access dictates exactly how the form is called – is it available publicly, is it SOAP or REST enabled, etc. The Web Users tab controls which Web Users can access the form. Web Groups controls which Web User Groups can access the form.
Building the Form
The Components section is where the form is built. The form is customized simply by selecting the different components (Checkbox, Dropdown, Text Field, etc.) and dragging them into the form. On the right side is where that particular action is configured. For example, take the Employee ID field. On the right-hand side, there is the Variable Name, employeeID, which will be passed to the Project.
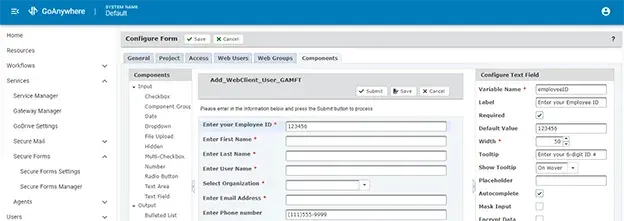
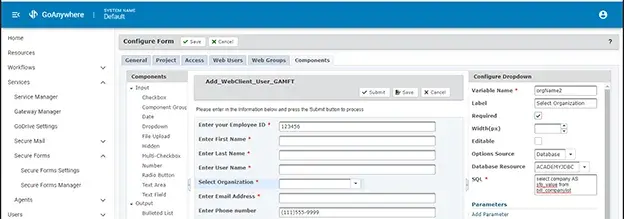
An option is also added to choose the user’s organization name, which is taken from a database in this example. Other attributes can be added to customize the component as needed.
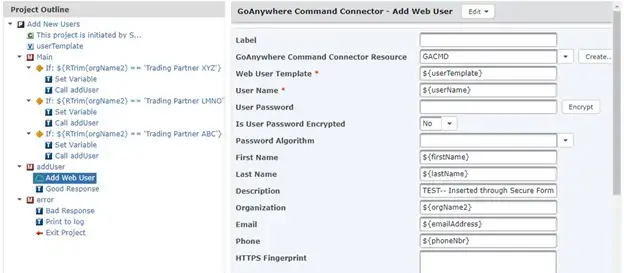
The Project
After saving the form, locate the Project that the form will call. In this example, the Project is called “Add New Users.” The Project will take the organization name and choose a Web User Template to use based off that choice. For example, if a trading partner’s organization “XYZ” is passed in, the Variable will be passed to the Project that signals that the template called “Trading Partner XYZ” should be used.
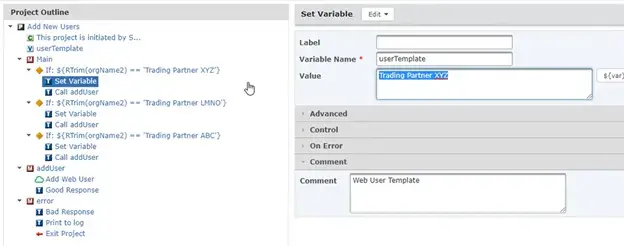
Once that Variable is set up, a module named “addUser” is called. This module contains a Task from the GoAnywhere Command Connector, Add Web User. This Task can bring in Variables to fill out the different parameters. ${userTemplate} is taken from the conditions mentioned previously, and the other information is passed in from the form. After this Task there are two options for Secure Form Response Tasks which will indicate to the Web User whether the new profile was created successfully.
The Final Steps
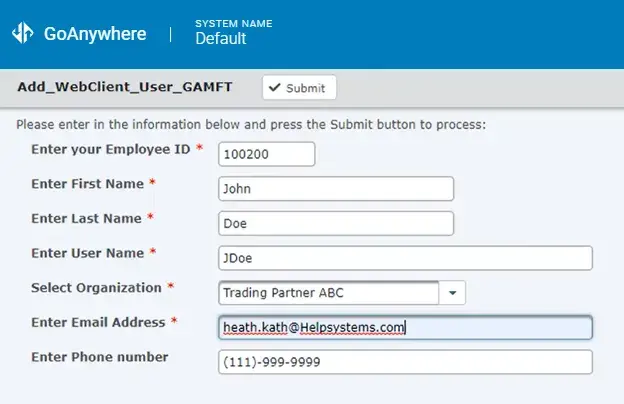
Here is the completed form as seen from a Web User’s view:
The user is notified that the form was submitted successfully and that a new user was created. The new user will receive emails sharing the username and generated password as specified by the Web User Settings in GoAnywhere.
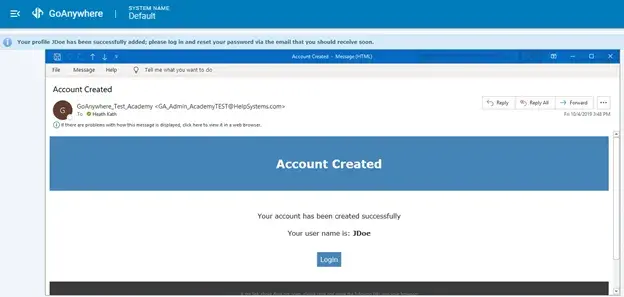
Following these links, the user will be prompted to login and create a new password. The new user is now all set up and logged in – all starting from a Secure Form.