With the GoAnywhere Salesforce Cloud Connector, you can automate the creation and deletion of accounts, manage contacts, cases, leads, and perform various Salesforce-supported CRM functions. In this tutorial, you will learn how to convert a CSV file with prospect or customer contact information and insert those new records directly in Salesforce. While this example uses a CSV file, GoAnywhere MFT can also translate other forms of information such as JSON, XML, Excel, or read information from databases.
Downloading the Salesforce Cloud Connector
The Cloud Connector Marketplace provides an online catalog of Cloud Connectors that can be downloaded to the GoAnywhere installation and used in Project workflows. Follow the instructions below to download the Salesforce Cloud Connector.
- Log in as an Admin User with the Product Administrator role.
- From the main menu bar, select System and then click the Cloud Connectors link.
- On the Cloud Connector page, click Add Cloud Connector on the page toolbar.
- Scroll to the Salesforce Cloud Connector or search for it using a keyword search.
- Click Install to download and install the Cloud Connector.
Configuring the Salesforce Resource
Follow the instructions below to configure the Salesforce Resource in GoAnywhere MFT.
- Log in as an Admin User with the Resource Manager or Security Officer role and click the Resources link from the main menu.
- Select Cloud Connectors from the list of Resource Types.
- Click the Add Cloud Connector button.
- Choose the Domain where the resource can be accessed from.
- Choose the Salesforce Connector from the drop-down list of Cloud Connectors installed and click Continue.
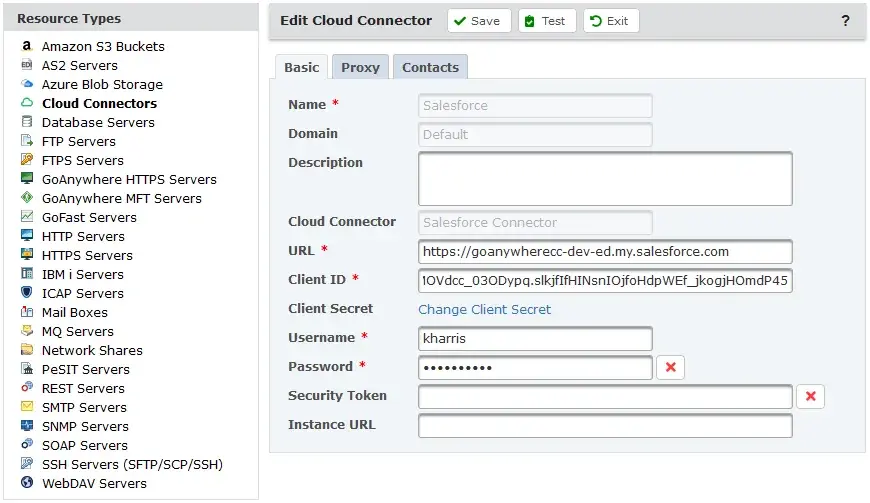
- Specify the following fields on the Basic tab.
- Name – A user-defined name which identifies the resource. This name should be descriptive enough so users can quickly identify this resource when prompted to choose from a list.
- URL – Your Salesforce instance. For example, https://instance_name.salesforce.com
- Client ID – Your Salesforce API client ID.
- Client Secret ‐ The consumer secret provided by Salesforce when configuring GoAnywhere as a conneceted app.
- Username – The user name used to authenticate to Salesforce.
- Password – The password of the user authenticating to Salesforce.
- Click Test to confirm that the Resource is working.
Building the Salesforce Project
The Read CSV and Salesforce Cloud Connector Tasks contain everything you need to utilize the service in your GoAnywhere projects and workflows.
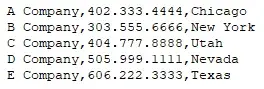
The following image is an example of a CSV file containing new account information.
Follow the instruction below to build a project that will read the CSV file and insert the records into Salesforce.
The Read CSV Task
The Read CSV task will read the CSV file containing the account information and store it in a RowSet variable.
- Log in as an Admin User with the Project Designer role.
- From the main menu, select Workflows and then click the Projects link.
- Drill down to the folder you want to work in.
- Click the Create a Project link in the page toolbar. Give your Project a name, and then click Save.
- The Project Designer page will be shown.
- Expand the Data Translation component.
- Drag the Read CSV task to the Project Outline.
- Define the following fields on the Read CSV task.
- Input File – Specify the path and file name of a single file to read the data from.
- Output RowSet Variable – Specify the name of a variable which will contain the data read from the specified input file(s). The variable will be of type RowSet and may be used in subsequent tasks that accept a RowSet input variable. The variable will be created if it does not exist.

Authenticating with Salesforce
- Select Cloud Connectors in the Component Library.
- From the Salesforce Connecter component list in the Component Library, drag Authenticate to the Project Outline.
- Under Output Variables, define the following field:
- Authentication Token – The name for the token used to authenticate future requests in Salesforce.
Iterating Over the CSV Content with a For-Each Loop
- Select Loops from the Component Library and then drag the For-Each Loop task to the Project Outline.
- In the For-Each Loop task, define the following fields:
- Items Variable – Specify the name of the variable you created in the CSV task’s Output RowSet variable field above, using ${var} notation. In this example, the ${newAccount} is used.
- Current Item Variable – Specify a variable name which will be populated with the item at the current index. The variable can then be used in the tasks inside the loop or anywhere in the project. The value must be a valid identifier (e.g. row).
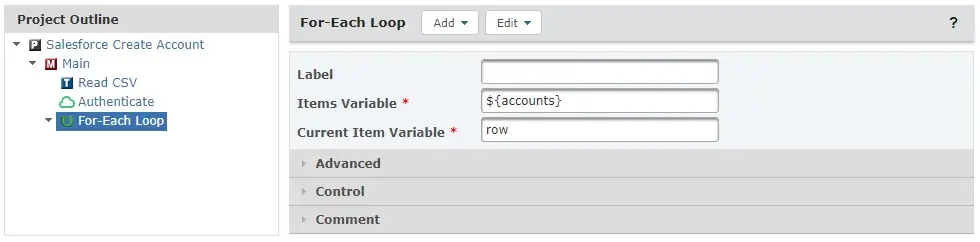
When looping through the ${newAccount} RowSet variable, a row is exported to the Current Item Variable specified on the For-Each Loop task. To access the value of a specific column in the row, we will use the following syntax: ${rowVar[columnNumber]}
Adding the Account Information to Salesforce
- From the Salesforce Connector in the Component Library, drag Add or Update Account to the Project Outline.
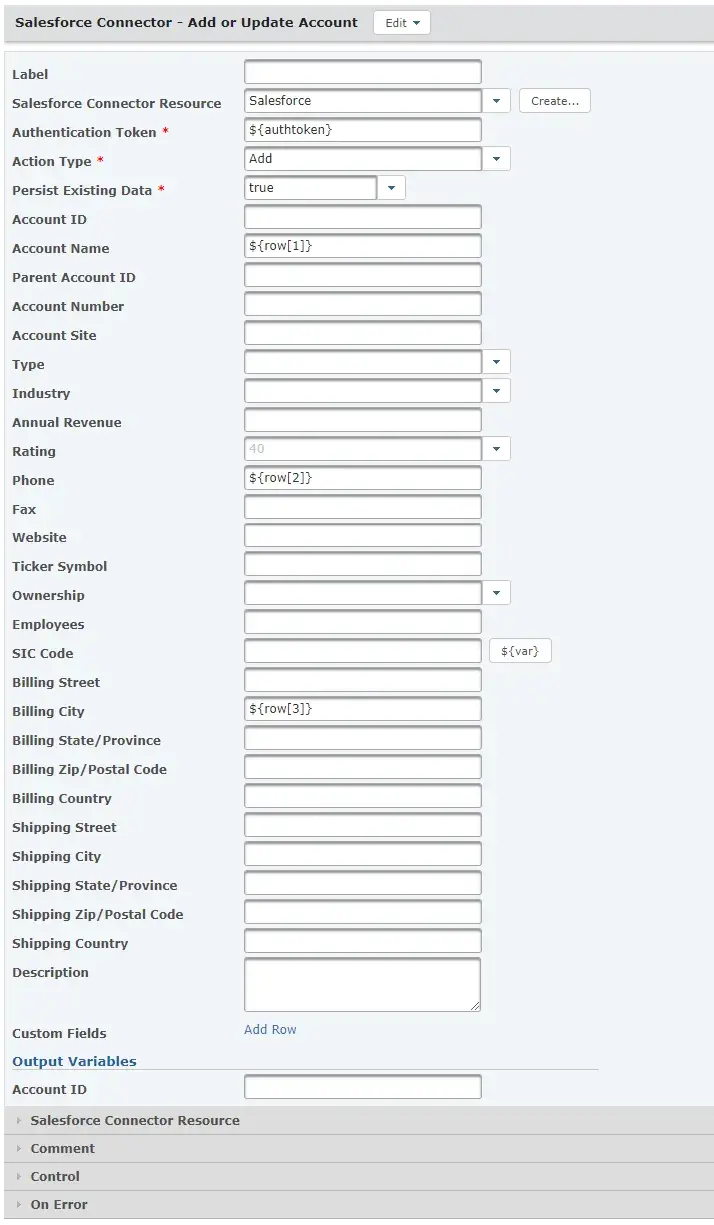
- On the Add or Update Account panel, specify the following fields:
- Salesforce Connector Resource – Select the Salesforce Resource created previously form the drop-down list.
- Authentication Token – Use the variable containing the Salesforce Authentication Token.
- Action Type – Specify whether to create a contact or update an existing contact. In this example, we are adding a new account.
- Account Name – The name of the account. In this example, the first name value is contained in the ${current[1]} variable, the first column of the CSV file.
- Phone – The primary phone number of the account. In this example, this value is contained in the ${current[2]} variable, the second column of the CSV file.
- Billing City – The city portion of the billing address. In this example, this value is contained in the ${current[3]} variable, the third column of the CSV file.
- Click the Save button to save the project.
Automating this task
The following image illustrated the Project Outline for the Salesforce Create Account Project:
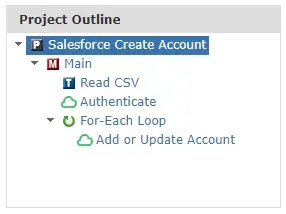
While this example demonstrates how a single file can be read and inserted into Salesforce, this Project can be enhanced to automatically execute on a scheduled basis, invoked through a trigger, or integrated into your existing process.