In this tutorial, you will learn how to get started with file transfer services, such as FTP, FTPS, SFTP, HTTPS, AS2, and GoDrive in GoAnywhere MFT. Learn more about AS2, AS3, and AS4.
To allow trading partners (also known as Web Users) to connect to GoAnywhere MFT to upload or download files, you must start the service listeners for the protocols that your trading partners will use.
Not using GoAnywhere MFT yet? Start a free trial and test it out for 30 days.
Service Manager
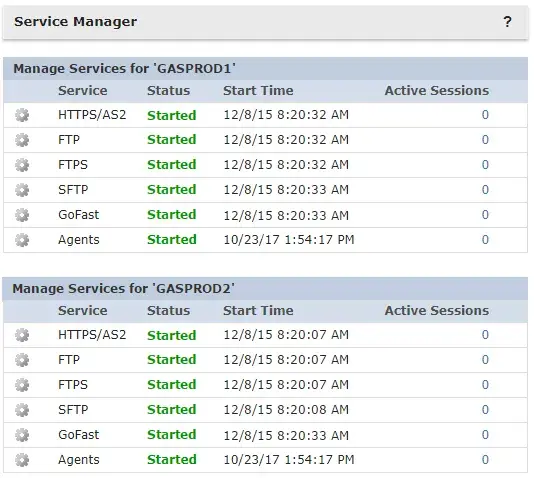
Select the Services drop-down from the main menu and then choose Service Manager from the sub-menu. The list of available services will be displayed. To start a service, click on the Start button next to the desired protocol. If you are licensed to the feature, the status will change to "Started".
If you want the service to start anytime GoAnywhere is launched, click the pencil icon to edit the protocol's configuration. Please note that you must start the HTTPS service to use the Web Client for any Ad Hoc file transfers including GoDrive and Secure Mail.
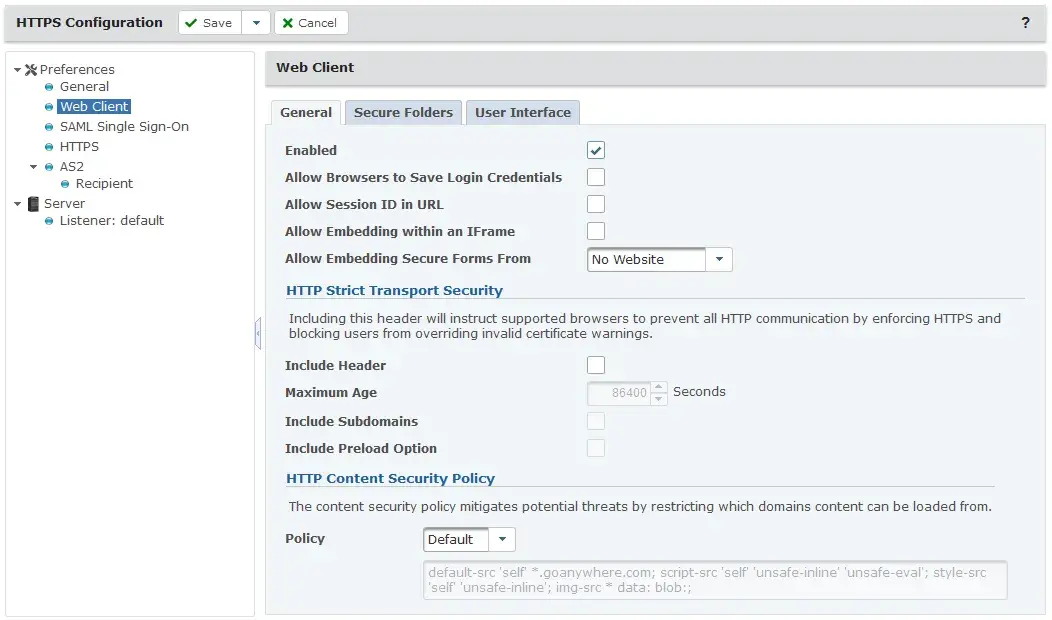
Under the General section, select the radio button next to Yes for Automatically Start Service. There are other HTTPS Web Client features you can configure while in this module.
The Web Client section has three tabs; General, Secure Folders, and User Interface. The General tab is where you will set basic browser security features including the URL that you want the Web Client to utilize.
The Secure Folders tab lets you adjust settings for the optional Java applet, and the User Interface tab is where you can customize the login and Web Client screens with your own corporate branding.
The languages configuration allows you to enable any of the international languages and specify the headings and disclaimers which Web Users see prior to logging in to the Web Client.
Click the Save and Finish button once you've completed your preferences
Web User Management
Now that the service is configured and running, the next step is to create a Web User and give them access to the HTTPS and SFTP service as well as some useful file transfer features.
To create a Web User, select the Users menu and then choose Web Users from the sub-menu. Click on Add Web User in the toolbar at the top of the page. Type a unique User Name and enter the optional profile information to help describe the user.
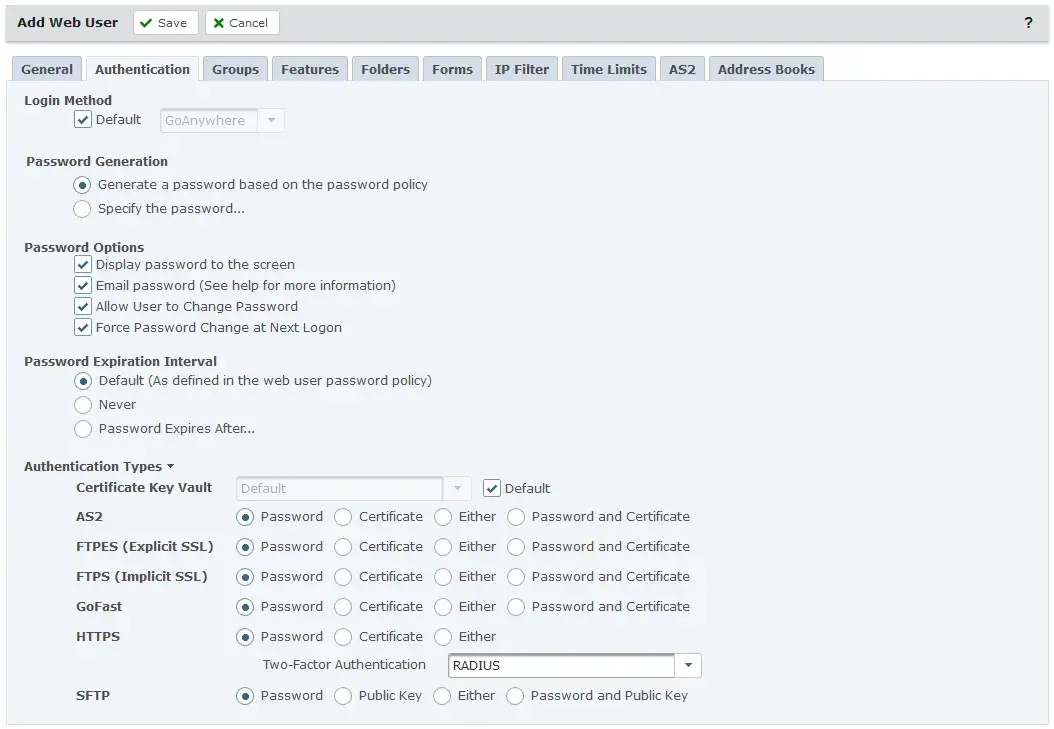
Click on the Authentication tab. By default, the Web User password will be created automatically and the password will be displayed to the screen when the Web User is created. You can also specify a password manually and adjust other authentication options on this tab.
The Features tab is where you can grant this user access to the different file sharing features of GoAnywhere. Enable the HTTPS and SFTP protocols, as well as GoDrive. Set the GoDrive Access to Full Licensed User if you want them to upload files and use GoDrive synchronization apps. Next, enable Secure Folders which will give them browser-based access to authorized folders on the network.
If you want the Web User to send secure download-only links to their customers and partners, you can enable the Send Secure Mail feature.
The Folders tab is where you will configure the network folders that the Web User has access to. These locations will be accessible in Secure Folders in the Web Client and from FTP, FTPS, SFTP, and AS2. You can add folders using relative or physical paths. Next to permissions, click on the Select All option to provide the Web User full access rights to their Home Directory, and then click on the Save button.

You will be returned to the Web Users page with a message at the top indicating what was just completed. The message will state that the User Name was created, a Home Directory was created, and it will display the password that was auto-generated if that option was enabled.
File Transfer Services
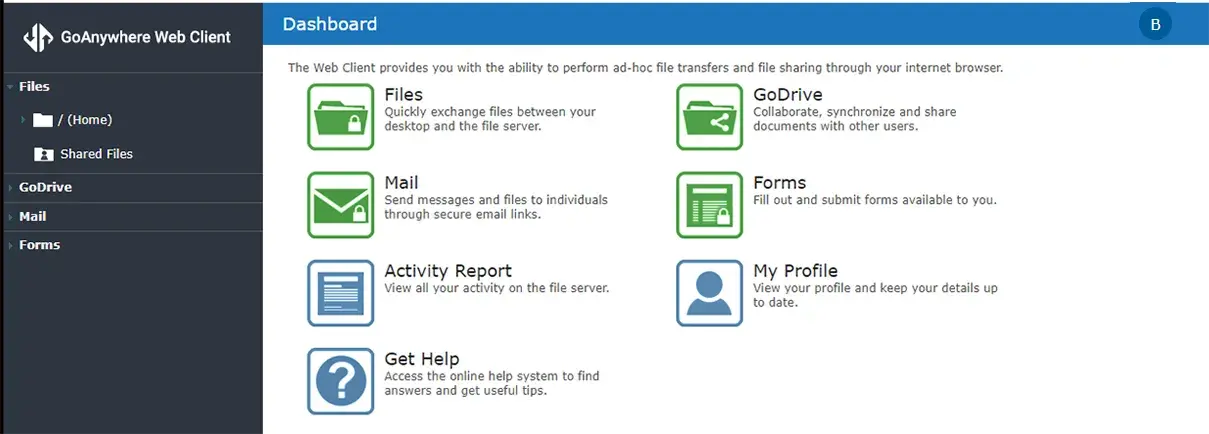
Now your Web User can connect to GoAnywhere using the protocols that are authorized to their account. You can connect to the Web Client using the GoAnywhere URL and the port number to the Web Client. The default port number is 443. Log in with the User Name and Password for the Web User account. The Web Client Dashboard is displayed and contains the features that were enabled for the Web User.
From here you can collaborate on files using GoDrive, Send Secure Mail messages, or access network locations using Secure Folders.