In this tutorial, you will learn how to use GoAnywhere's Open PGP encryption software to encrypt files and sign them.
Open PGP's file encryption tool enables you to both store sensitive information and transmit that information across insecure networks, such as the internet or email, so that it cannot be read by anyone except the intended recipient.
A public key is used to encrypt a file and verify a signature. A private key is used by the owner to decrypt and to add a digital signature to files.
Encrypting Files with Open PGP
How to encrypt files with Open PGP:
- Get your trading partner’s public key to encrypt the file.
- Import your trading partner’s public key into a Key Vault.
- Use your file transfer tool to create a Project to encrypt the file.
- Sign the file with your private key if required.
- Confirm that the project was set up correctly before executing.

Continue reading the full tutorial below for more details.
PGP Key Management
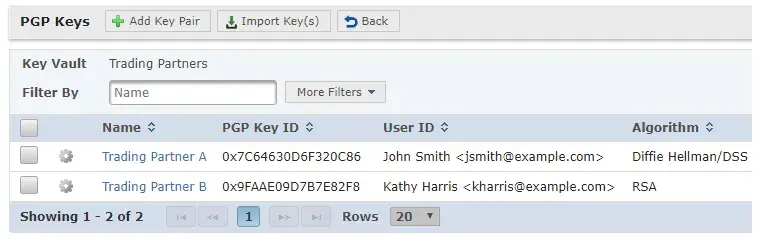
Create, import, and export PGP keys through the GoAnywhere Key Management System. Keys are protected and organized into Key Vaults for security access controls. Access the Key Management System through the Encryption drop-down menu.
Protecting a File with PGP Encryption
To get started, let's encrypt a file that we can send to our trading partner. You will need your trading partner's public key to encrypt the file. Your trading partner will use their private key to decrypt the file once it is received.
- If you have not done so already, import your trading partner's public key into a Key Vault.
- Then, create a new Project and add the PGP Encrypt task to the Project Outline.
Image
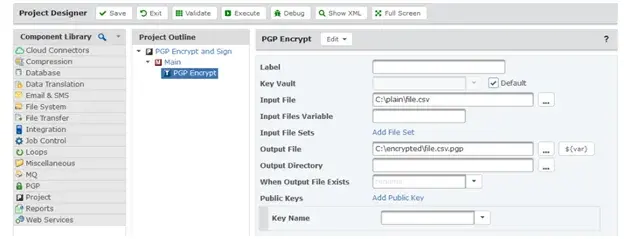
PGP Encrypt Task | How to Encrypt PGP Messages - On the PGP Encrypt task, select Key Vault for the Key Location and select the appropriate Vault Name from the drop down menu.
- Next, enter the Input File location which can be a local file on the GoAnywhere server, a UNC path, an NFS mount, or an SMB/CIFS network server. You will also need to enter the Output File location for the encrypted file. Typically the file extension will end with ".pgp".
Image

Public PGP Key Selection | How to Encrypt PGP Messages - While still on the PGP Encrypt task, click on the Add a Public Key option. For the Key Name field, click on the drop-down arrow and select the public key for your trading partner.
Now you have a Project that can be used to encrypt a file to be sent to your trading partner.
Signing a File
Digital signatures allow your trading partner to ensure that you are the true originator of the files. You only need to sign a file if your trading partner requires that you sign your files with your private key. This will embed a digital signature into those files, and your trading partner will use your public key to authenticate your identity when decrypting the files.
- To add a signature, expand the Secret Key panel and select the Add a Secret Key option.
- On the Key Name field, select your private key and enter the Password of the key. If you do not have a private key, you can create one in the Key Vault.
Executing the Project
To test the Project, click on the Execute button, which will:
- Save the Project,
- Validate all fields are configured properly (also known as compiling), and
- Begin Project execution.
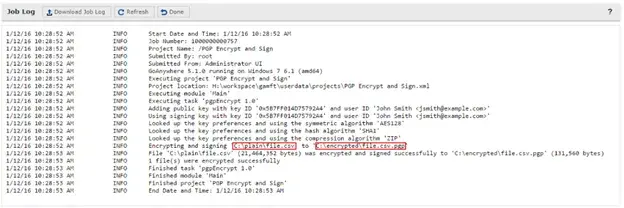
Once complete, you will see messages indicating that the Job completed successfully along with a link to view the Job Log. You can now share that file with your trading partner using FTP, SFTP, email, or another method. You can review the Job Log for more information on what took place.