GoAnywhere MFT: The #1 File Transfer Solution
GoAnywhere Managed File Transfer is a comprehensive managed file transfer solution that will manage your organization’s file transfer software, file sharing, secure FTP, and automation needs through a single interface.
GoAnywhere MFT streamlines the exchange of data between systems, employees, customers, and trading partners.
GoAnywhere's file transfer software has the flexibility to simplify, secure and audit:
- Batch server-to-server file transfers
- User-to-system ad-hoc file transfers
- Person-to-person file collaboration


Popular GoAnywhere MFT Features
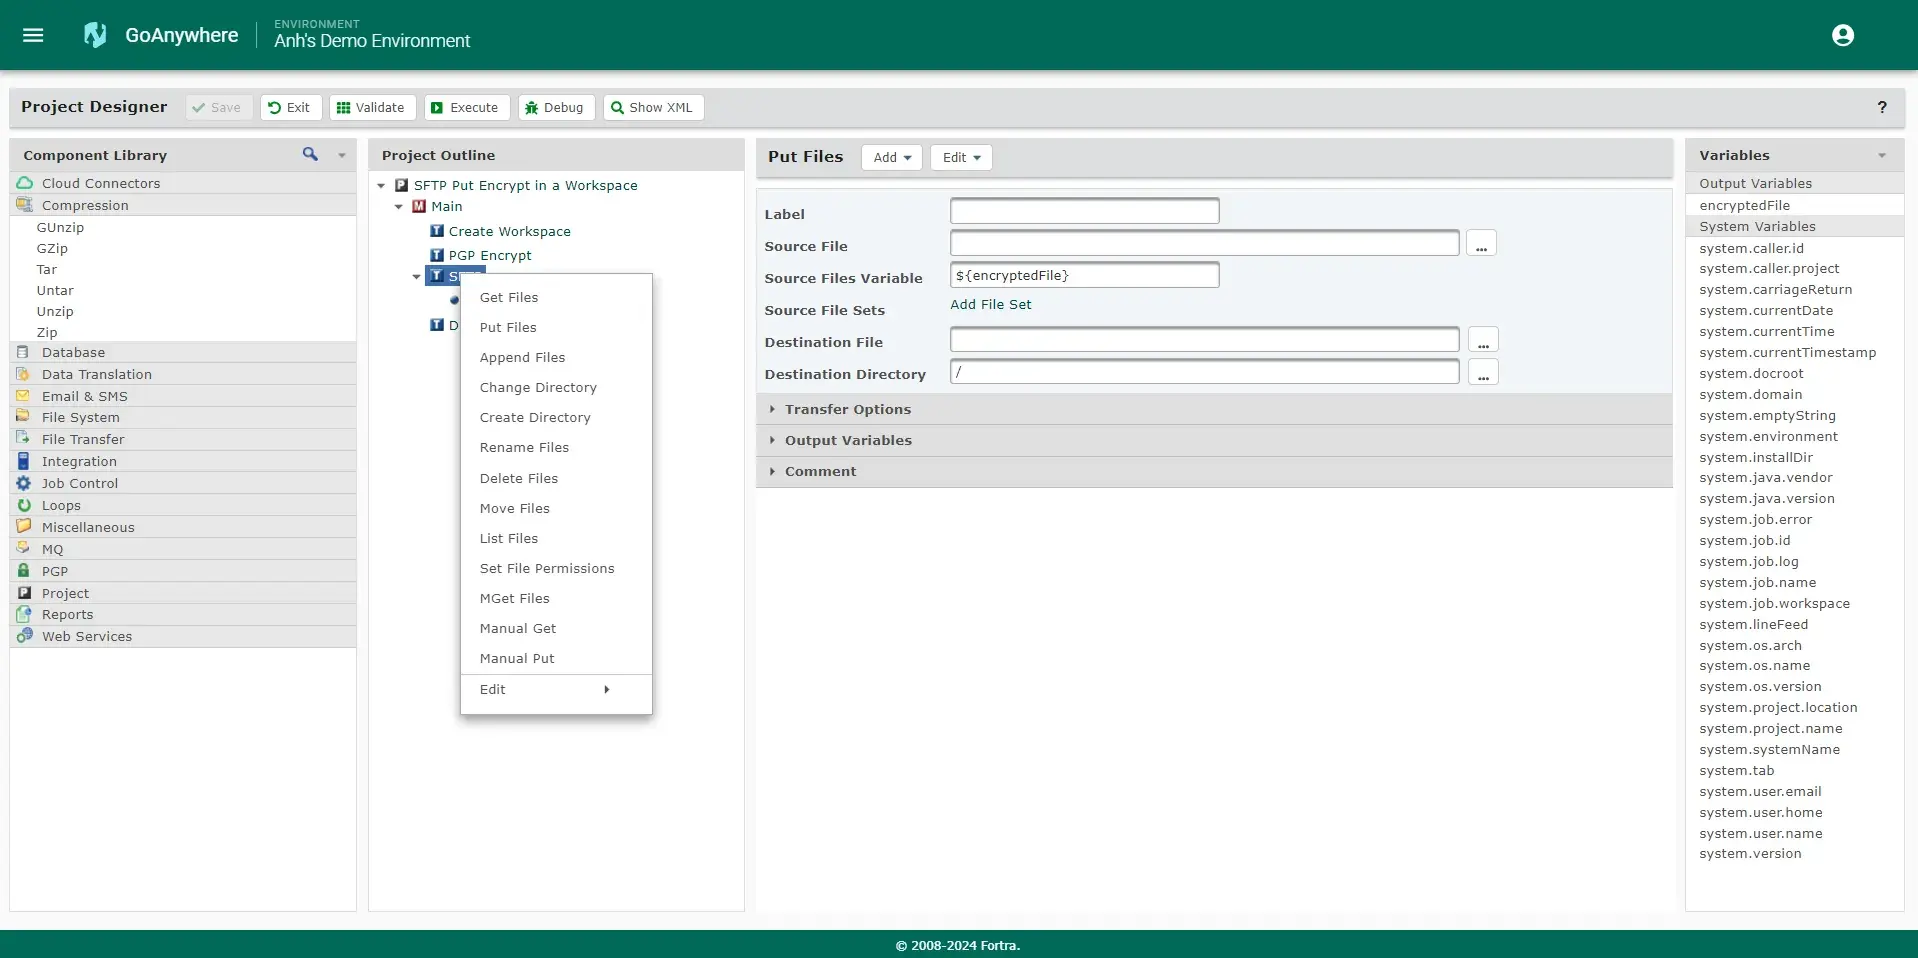
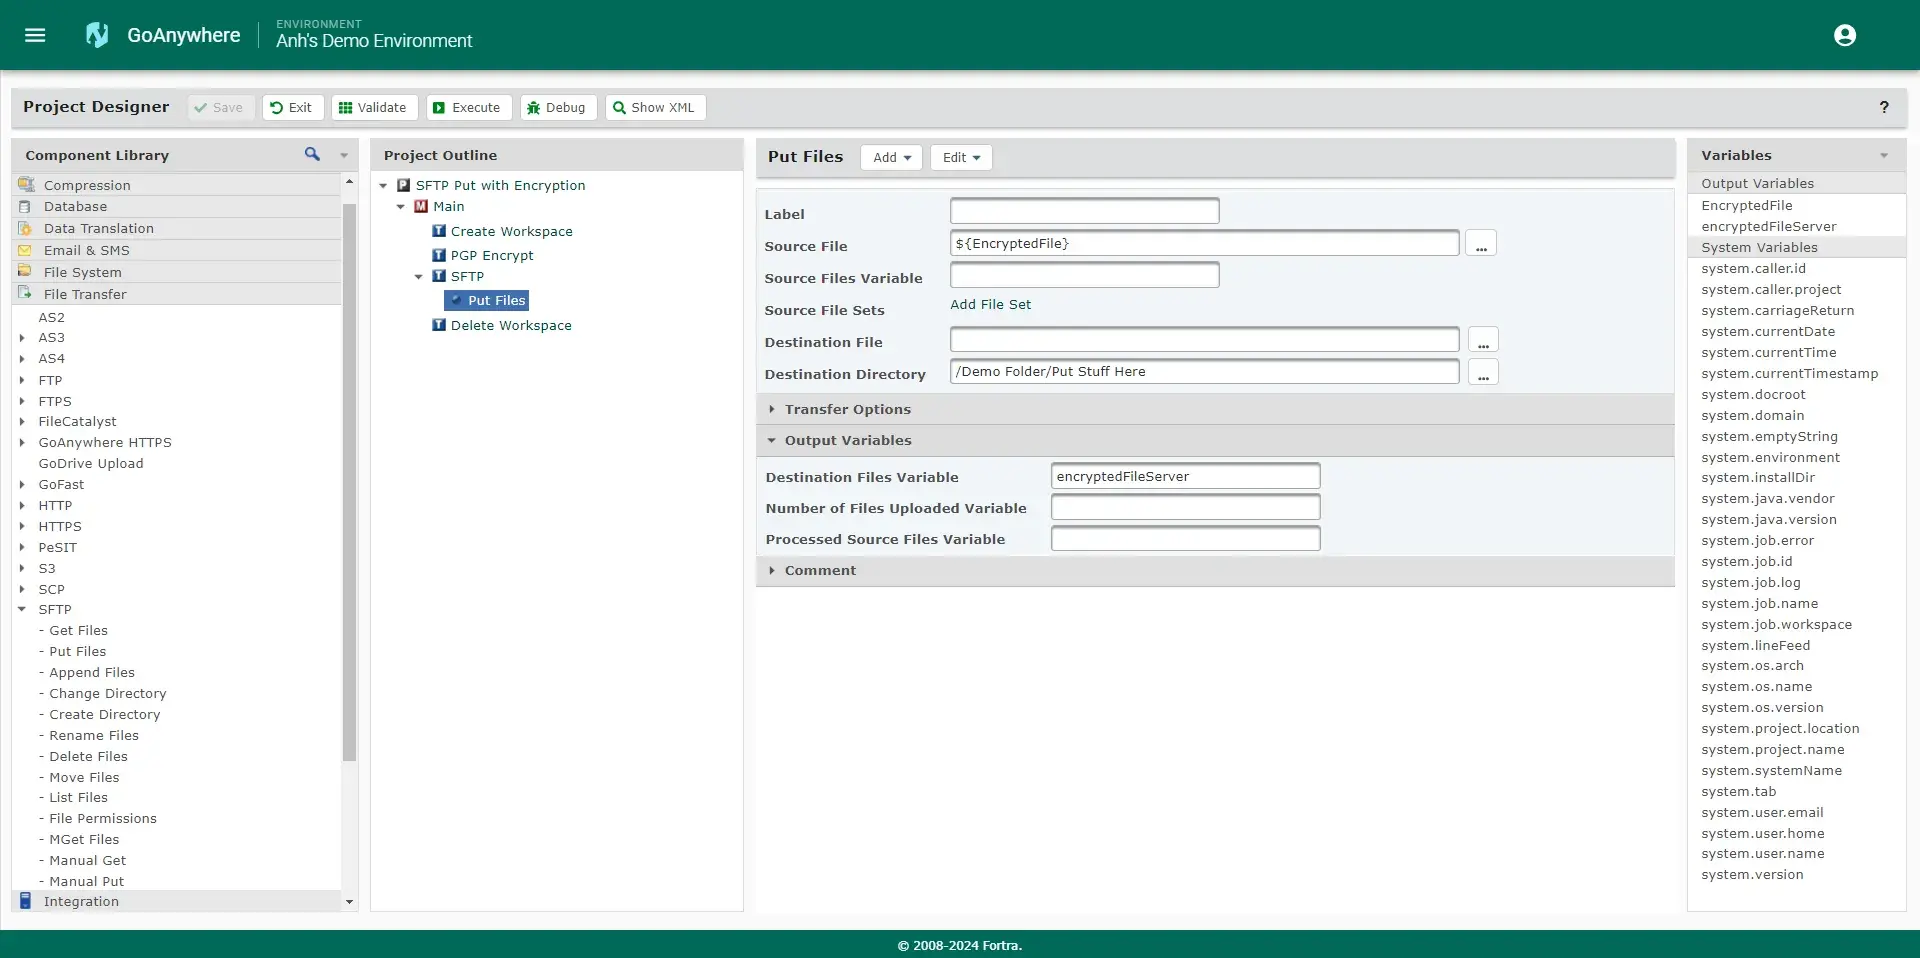
Automation
GoAnywhere MFT's workflow automation eliminates the need to use multiple products and scripts to handle your business processes. Achieve end-to-end automatic encryption and file transfers via the following file transfer software features:
- Multi-step workflows with over 60 different tasks
- A comprehensive built-in scheduler for running workflows
- Monitored folders with options to scan for new, changed or deleted files
- Automated email alerts or file processing when triggered events (e.g. upload, download) occur
- Commands and APIs for launching transfers from remote systems and applications
- Create and schedule file transfers using drag and drop tools
Commands & APIs
Commands and APIs are provided to allow external applications to run file transfers and workflows (Projects) in GoAnywhere MFT. These commands and APIs are available at no additional charge and can be installed onto Windows, UNIX, LINUX, IBM i (iSeries), HP-UX and Solaris platforms. The GoAnywhere MFT commands can be run from system command lines, scripts, programming languages (e.g. JAVA and .NET), 3rd party schedulers, and SOAP and REST Web Services.
File Servers
GoAnywhere MFT provides file services to allow customers, trading partners and employees to connect to your system and exchange files in a secure environment. This is an on-premises solution with extensive management controls and audit log reporting. An HTTPS server can also be enabled to allow users to perform ad hoc file transfers through an intuitive browser-based interface.
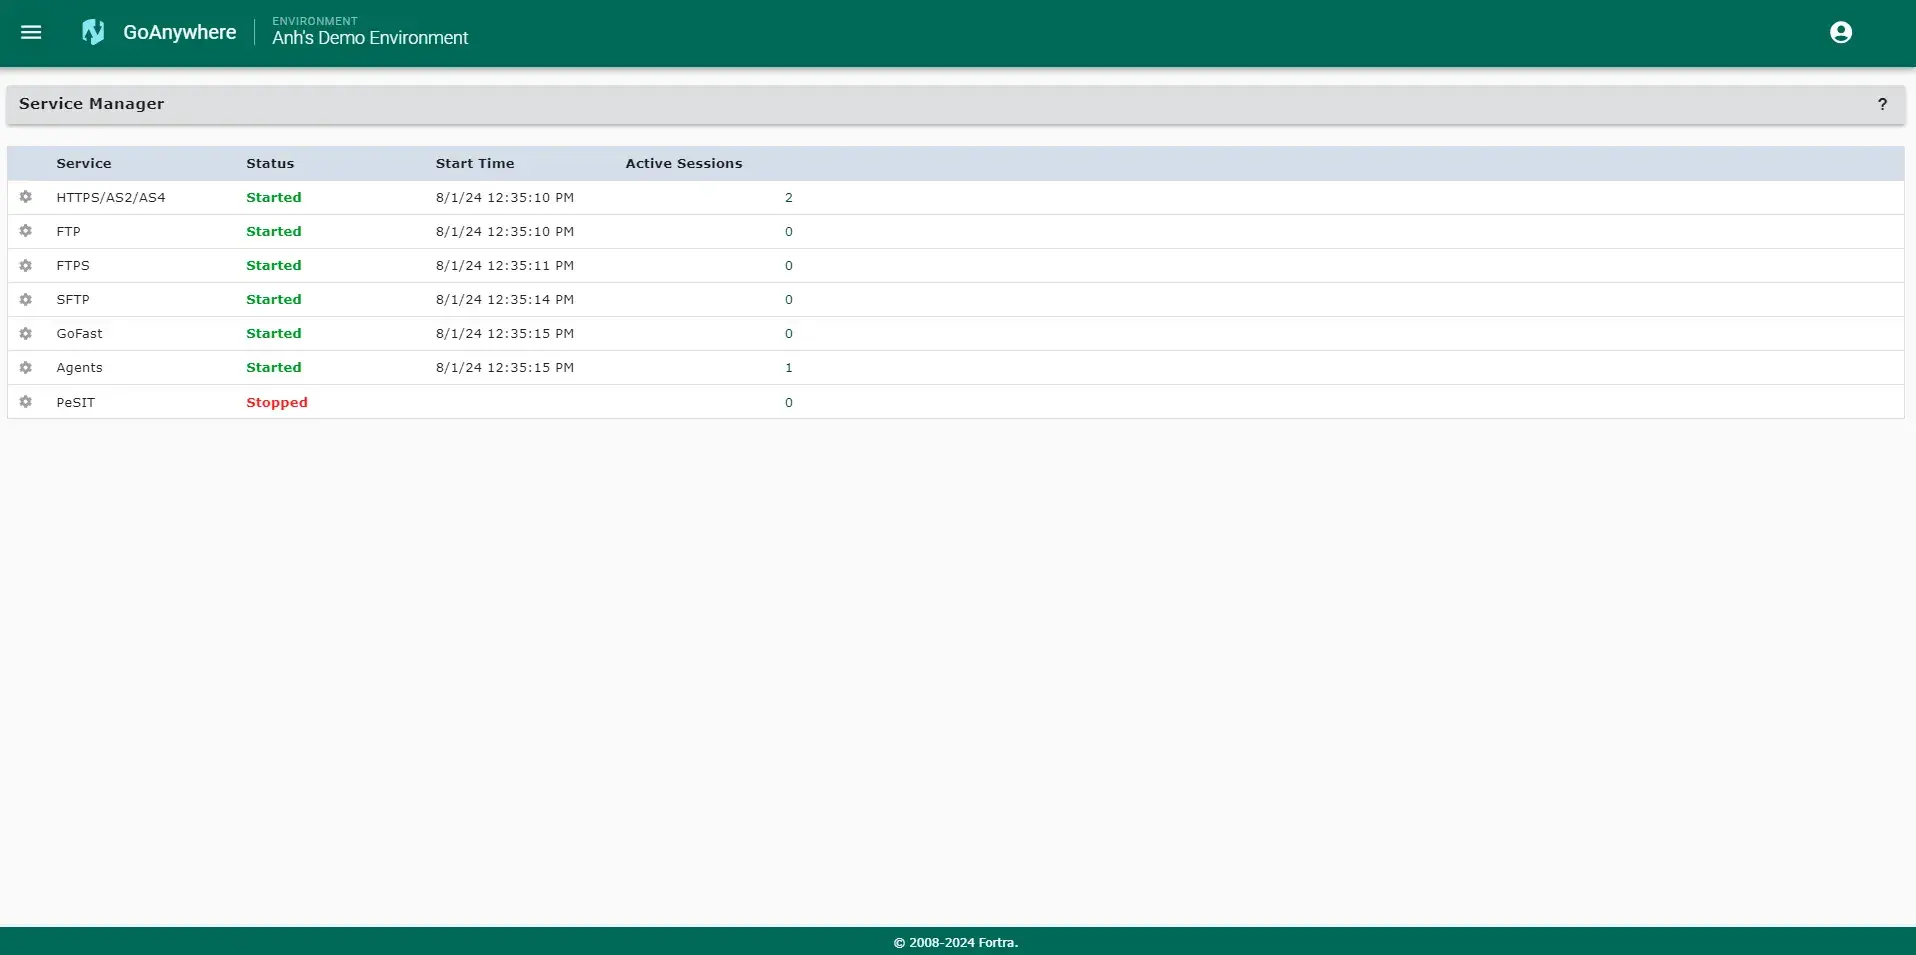
Connectivity
GoAnywhere MFT software connects to a wide variety of servers for exchanging data.
- Secure FTP servers using SFTP, SCP and FTPS protocols
- AS2 and HTTP(S) servers, including Web Services
- Standard FTP and Email servers
- PeSIT servers for moving files over TCP or SSL
- Local file systems, network shares and MQ servers
- Moving data to and from Amazon S3 Buckets and Azure Blob Storage
- Popular applications such as Box, Google Drive, and SharePoint with Cloud Connectors
- And more!
You can use these servers to exchange data with your external trading partners, clients, remote locations, vendors, and stakeholders.
Cloud File Transfer and Integrations

Secure your cloud file transfers and connect the web applications you use every day with GoAnywhere for added efficiency and security:
- Flexible hosting with MFT as a Service (MFTaaS) — no need to choose your own cloud computing platform.
- Automated file transfer and workflows on cloud environments and private networks.
- Out-of-the-box Cloud Connectors that integrate with popular web and cloud services like SharePoint, Salesforce, and Dropbox.
- Connection to internal and external trading partners through folders to cloud-based file systems, including Amazon S3 buckets.
Acceleration
The FileCatalyst Service in GoAnywhere is an integrated service that provides enterprise-grade file acceleration for moving large data quickly from anywhere in the world, even in adverse network conditions.
Files can be transferred at speeds up to 10 times faster (or more) over traditional protocols, such as SFTP, FTPS or HTTP. Plus, those files can be sent even while they are still growing or are being encoded. This service makes it possible to accelerate your data for time-sensitive file transfer workflows
Move Files Securely with GoAnywhere Managed File Transfer Software
Obtain a personalized quote based on the features you need.
Implementation & Deployment
Get Started
Start using a single, easy-to-access platform for all your data transfer activity. With GoAnywhere file transfer software you can:
- Manage file transfers and perform multiple tasks in one place, including job scheduling, file collaboration, secure email, and compliance auditing and reporting.
- Gain access to a web based modern interface that allows users to build workflows on the fly, from any device – anywhere.
- Utilize our browser-based interface with security controls to enhance visibility into everything that’s going on.
- Centralize from any device with the GoAnywhere MFT iOS app.
Fill out the form to get a personalized quote.
GoAnywhere Managed File Transfer FAQs
Secure Your File Movement with GoAnywhere
Start a free 30-day trial and see if GoAnywhere is the right solution for your organization.